Quick Start
0 Server Requirements
- Memory >= 24GB
- Free hard drive space >= 30GB (SSD hard drive recommended for better performance)
- NVIDIA GPU (video memory >= 4GB, more video memory may be needed if you want to store the knowledge base in the GPU, see "Knowledge Base" for details), NVIDIA driver and CUDA (version >= 12.2) have been installed
- Mainstream Linux distributions on the server side (such as Ubuntu, Debian, CentOS, RHEL, etc.)
- Python (version 3.10 ~ 3.12)
1 Installation
- Click to download the following files, then transfer the files to the Linux related directory of the above server
- install.sh (Note: Be sure to name the file "install.sh" after downloading)
- TeliChatSecRun.zip (Note: Be sure to name the file "TeliChatSecRun.zip" after downloading)
- Run the installation script (the program will be installed in the current directory)
Notice:
bash install.sh en- If the Python used in the project is in a virtual environment, the virtual environment must be activated first before executing the script.
- In some cases, the system will prohibit direct installation of Packages in the only Python version of the system (a prompt similar to "error: externally-managed-environment" may appear after executing the above script), then a Python virtual environment must be created and activated before executing the above script.
- Pip needs to be installed in the virtual environment
- If necessary, you can manually create the TeliChatSecRun directory in the current directory, but you must return to the current directory to execute the installation script
- If the installation script is interrupted or fails to execute, you can try to execute it again
- After the installation script is successfully executed, it will prompt
'install.sh' has finished executing.. If the script execution ends and this prompt does not appear, please submit the final error message to "Issue" in the upper left corner of the homepage
2 Configuration
- Enter the
TeliChatSecRundirectory
2.1 Configure parameters in ./conf/public.conf
-
DEV_LANG
- This is development language, should be set to "en", which means American English (en-US) is used by default when developing ChatTrees or building knowledge bases, and at the same time the system will use a large language model with stronger English capabilities. The development language can also be Chinese and let the system use a large language model with stronger Chinese capabilities: just switch the current page to Chinese in the upper right corner and set it according to the requirements of the Chinese page.
- The development language is not the language spoken by the user in the conversation (i.e. user language), and the default user language is also American English (en-US). For other user languages, see "Multilanguage"
-
LLM_PROVIDER: This setting consists of two parts separated by a colon
- The first part is the platform, which currently supports:
- "gemini" refers to Google's Gemini LLM services. The API Key can be obtained at https://aistudio.google.com/api-keys
- "gpt" refers to OpenAI's GPT LLM services. The API Key can be obtained at https://platform.openai.com/api-keys
- "openrouter" refers to OpenRouter's LLM services. The API Key can be obtained at https://openrouter.ai/workspaces/default/keys
- The latter part is the model, which currently supports:
- "gemini-3.1", closed source model, actually uses two models gemini-3-flash-preview and gemini-3.1-flash-lite (applicable to different dialogue scenarios respectively), recommended use
- "gpt-5.4", closed source model, actually uses two models gpt-5.4 and gpt-5.4-mini (applicable to different dialogue scenarios respectively), too expensive
- "gemma-4-31b-it", open source model, actually uses model gemma-4-31b-it, recommended use
- Currently, only the following combinations of platforms and models are supported:
- gemini:gemini-3.1
- gpt:gpt-5.4
- openrouter:gemma-4-31b-it
- If you need to deploy the above open source model locally, please contact

- The first part is the platform, which currently supports:
2.2 Set API Key
- Set the value of the obtained API Key to the corresponding environment variable (just set one of the following)
export GEMINI_APIKEY=...
export GPT_APIKEY=...
export OPENROUTER_APIKEY=...
3 Run
- Enter the
TeliChatSecRundirectory - Run the following script (if a Python virtual environment was activated when executing the installation script earlier then it must also be activated here)
unset LD_LIBRARY_PATH
nohup python3 -u ./web.py port=8080 >./log/nohup.out 2>&1 &
nohup python3 -u ./api.py "start_port=8000" "gpu_index=0" >./log/nohup.out 2>&1 & - You can view the running log (including confirming that the application started successfully)
Note:
tail -f -n 1000 ./log/web.out
tail -f -n 1000 ./log/api-0.out- If the above log files still does not exist after running, you can first check the
./log/nohup.outlog file to see the cause of the error. - If CUDA-related
forward compatibility was attempted on non supported HWerrors appear in the logs, it may be because the CUDA version inside your container is too high and the CUDA version of the host is too low
- If the above log files still does not exist after running, you can first check the
4 Log in to the backend management page
Open the client browser and visit http://your_server_IP_or_domain_name: 8080 to enter TeliChat's backend management and testing UI (default username and password are "firstuser" / "78495820", to create a new user, please see "User Management"); note that sometimes you need to open the server's Linux firewall sudo ufw allow 8080/tcp
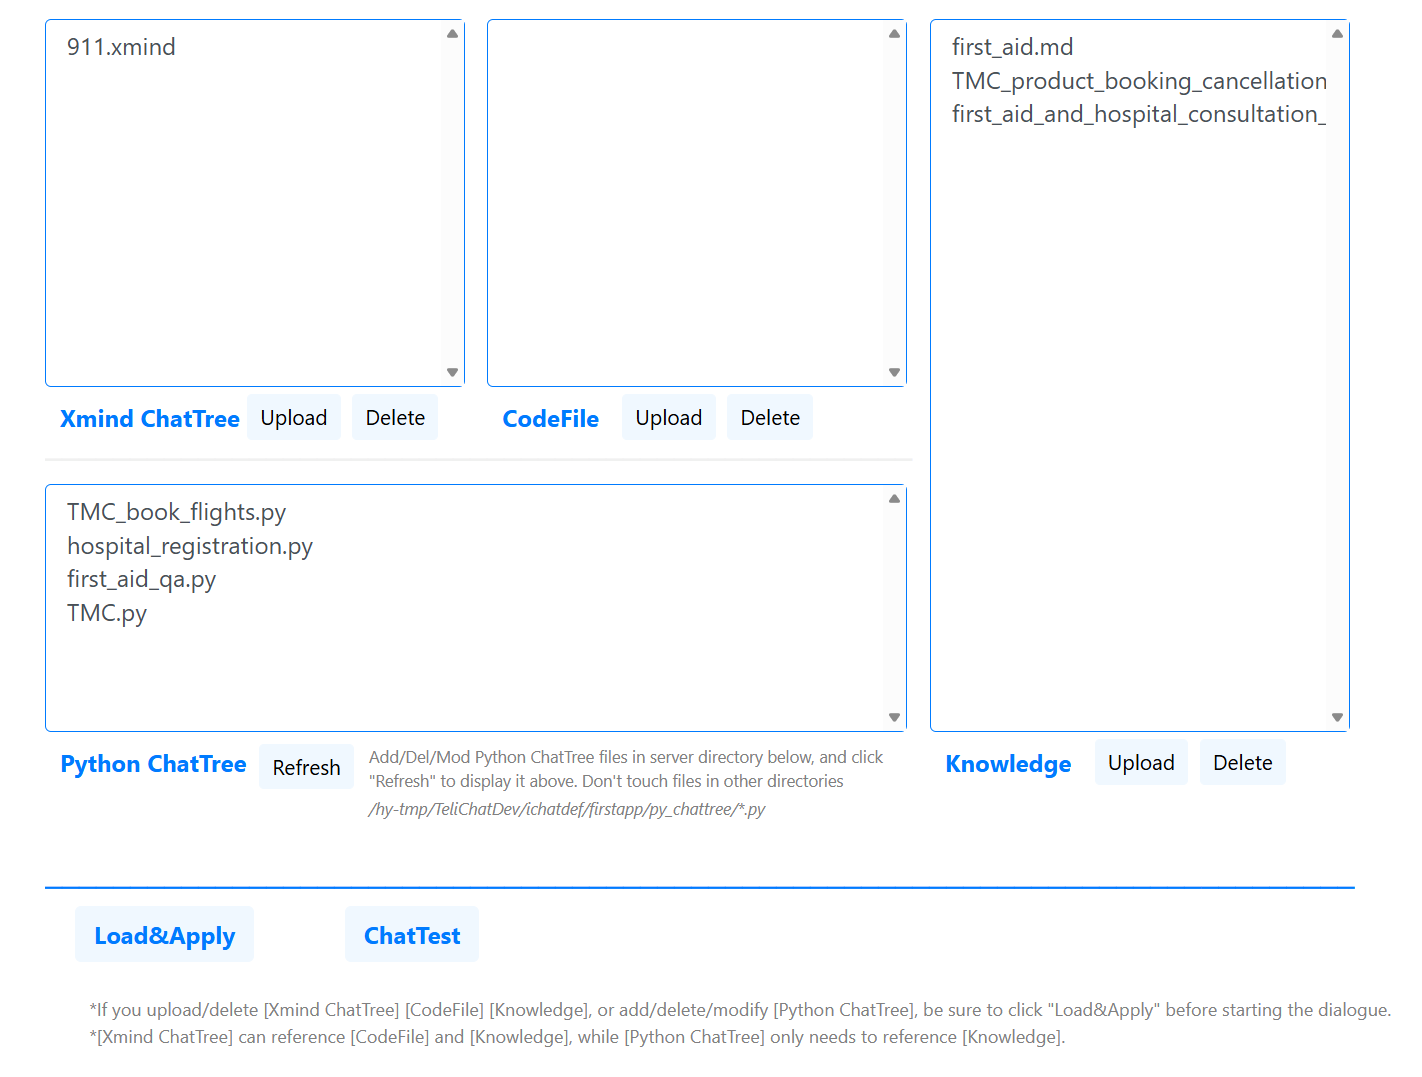
- The [Xmind ChatTree](.xmind), [CodeFile](.py) and [Knowledge(Base)](.docx/.md/.zip) in the picture can all be uploaded or deleted through the corresponding buttons.
- [Python ChatTree](.py) requires the user to create, copy, edit and delete files directly in the server directory displayed on the UI (it is recommended to use VS Code to directly edit the Python files in this directory, and you can also perform breakpoint debugging later)
- After there are changes (addition/deletion/modification) to these 4 types of files, be sure to click "Load&Apply" before using them.
- [Xmind ChatTree] can reference [CodeFile] and [Knowledge(Base)], [Python ChatTree] can only (and only needs to) reference [Knowledge(Base)]
5 Upload ChatTree
Python ChatTree or Xmind ChatTree choose one:
- Recommended to use Python ChatTree
- Individual node attributes are only supported by Python ChatTree
- Python ChatTree are more seamlessly integrated with Python code
- Only Python ChatTree supports IDE breakpoint debugging
- Python ChatTree supports generating HTML interaction diagrams, which can visually view the overall topology like Xmind ChatTree
- Xmind ChatTree is suitable for non-technical business personnel to build prototypes. Of course, certain code logic expansion can also be carried out by integrating Python scripts and introducing "Code File"
5.1 Python ChatTree
- Click to download: 911.py (Note: Be sure to name the file "911.py" after downloading)
- Save the downloaded Python file to the server directory displayed on the backend management page mentioned above
- There are detailed comments in the code to introduce the function of each part of the code
- Executed in the TeliChatSecRun directory
Then an HTML file with the same name will be generated in the same directory. For details on how to use it, please see "ChatTree HTML Interaction Graph"
python ./ichatdef/firstapp/py_chattree/911.py - You can find a more detailed introduction to the ChatTree and more Python ChatTree examples in "ChatTree and Knowledge Base Examples", including "TMC Platform" with complex interaction logic and "First Aid Knowledge Q&A" with simple knowledge questions and answers, all can be processed in the above way
5.2 Xmind ChatTree
- Download and install Xmind software at https://xmind.com/download (the free version is sufficient)
- Click to download: 911.xmind (Note: Be sure to name the file "911.xmind" after downloading)
- Upload the downloaded Xmind file to the [Xmind CHatTree] area in the backend management page
- Open the Xmind file and you can see that the graph is isomorphic to the graph in the HTML file above, except that it is slightly different where there is a Python script (but the execution semantics are the same)
6 Upload knowledge base
- Click to download: first_aid.md (Note: After downloading, be sure to name the file "first_aid.md" without the ".txt" suffix)
- Open the md file and you can see that the title lines in it all start with "#" or "##" or "###" etc.
- Upload the downloaded md file to the [Knowledge Base] area in the backend management page
- In the above Python ChatTree or Xmind ChatTree, the md file is referenced in the "static_reference_information" attribute of the "#start#" node.
- For more information about the knowledge base, see "Knowledge Base"
7 Load and apply
- Click the "Load&Apply" button in the backend management page
8 Test
- Click the "ChatTest" button in the backend management page to start test. For details, see "Chat Test". Note that 911.py has a startup InfoItem "{_phone_number_}". The value of this InfoItem needs to be entered before the chat test. The input format is such as "{...}=..."
9 Call API
- Click to download: Python sample code (Note: After downloading, be sure to name the file "demo_cmd_test_sse_for_docs.py")
- After modifying the assignment content at the beginning of the downloaded code file according to the actual situation (the system default user_name and access_key are firstuser / c6bfba3b9ae226482ecc7360c470b77acada28e5f544218c8e431a6ead75, there is also a startup InfoItem "{_phone_number_}"), and then run the code file
python demo_cmd_test_sse_for_docs.py - For details, see "API"
10 IDE debugging
See "IDE debugging"
11 Terminate / Update / Restart
- Use the following script to find the relevant process ID and kill it:
ps -aux | grep "api.py\|web.py\|/c/sip" - If you want to update the program, just follow the "Installation" steps above
- You can then perform the above "Run" steps to restart the system
- After restarting, the previous log file names such as "web.out" and "api-0.out" will be added with the suffix ".until_YYYYMMDD_HHMMSS", and then new "web.out" and "api-0.out" log files will be regenerated. If there are too many, you can clean them yourself. All log files are in "log" directory.
12 Others
- If you have any questions or suggestions, please click "Discussion" or "Questions" in the upper left corner of the current page
- If there are more specific needs (such as deploying LLM locally, or conducting real-time voice conversations, or requiring source code, etc.), please contact